A breakdown of how to build up the gear of your main squad: which UR items to craft first, in which order to level them and unlock stars. The order is built around damage: the current meta is that a strong DPS tears apart a team with top tanks if that team has a weak back line. So damage first, survivability second.
Purple items and the lineup
Do not dismantle SSR (purple) items until you have a UR replacement. They have no PvP bonuses, but their general stats are decent. The main squad of five heroes should always be fully geared, the second and third squads at least in purple with an eye on UR.
An example lineup the author builds the order on:
| role | hero |
|---|---|
| main tank | Arthur |
| second tank | Bella |
| main DPS | Marlena |
| second DPS | Claire |
| support | Celia |
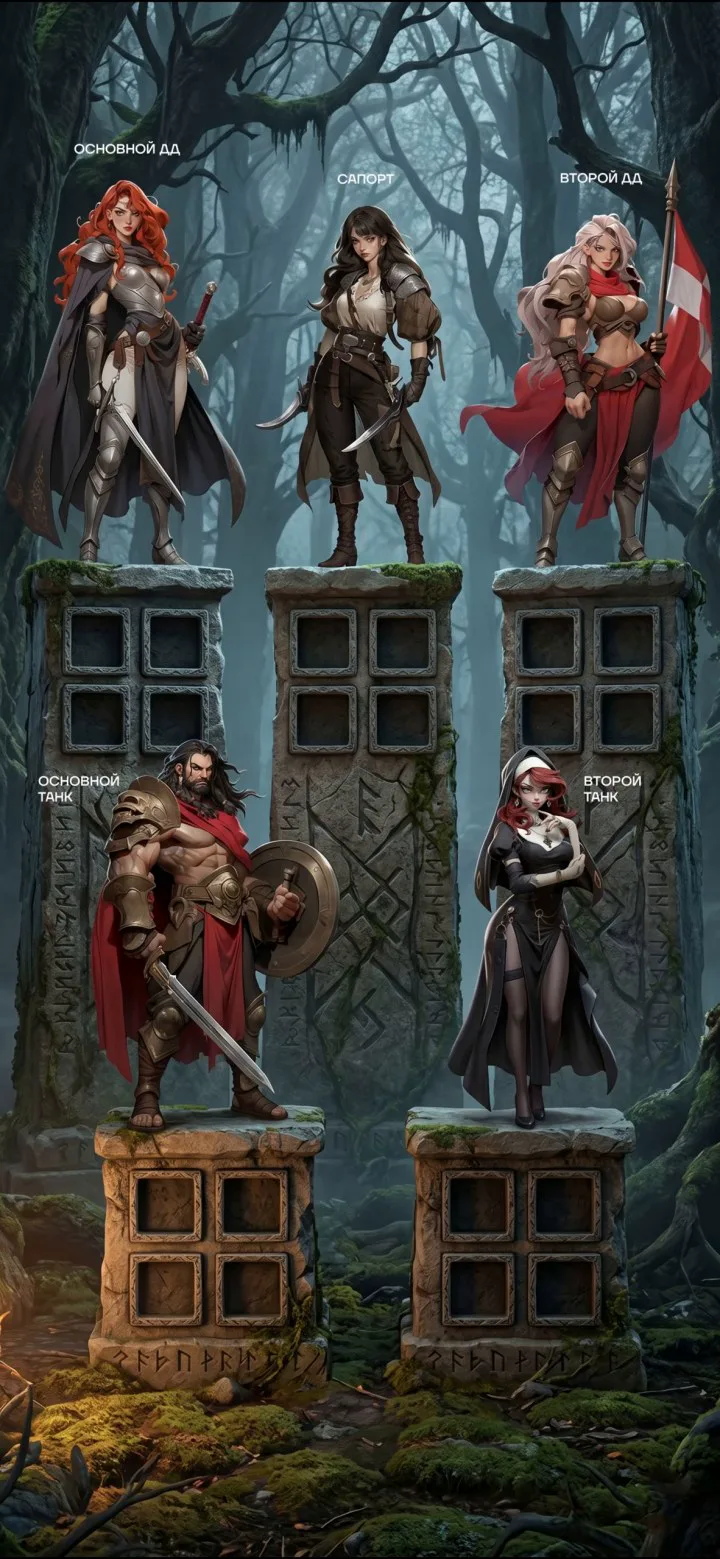
Tanks and DPS together are the "core four". Support is geared last.
UR items are crafted in the Gear Workshop from Lv.10: 750 Tempered Steel and 500,000 Herb, 48 hours.
UR craft order
The first UR item in a squad is the Sword for the main DPS. The first event of a server, Final Dawn, gives it too. The back line has little HP, and tanks survive on their base stats and skills anyway. Damage always lags behind, and the Crit Rate from swords, skills and curios works better the higher the damage is.
- Sword for the main DPS, then for the second DPS.
- Gauntlets for the main DPS, then for the second: besides ATK and HP, they have DMG RES - a reduction of all damage taken.
- Armor: main DPS, second DPS, main tank, second tank. The DPS must live until their Ultimate Skill: almost all damage dealers hit in a radius, and even if the front line falls earlier, the DPS will still get to answer.
- Boots in the same order: DPS, DPS, tank, tank.
- Gauntlets for the main tank, then for the second.
- Sword for the main tank, then for the second.
- Support, who needs to live and use skills rather than hit: Armor, Boots, Gauntlets, Sword last.
Levels: up to 20 and 40
A UR item unlocks bonus stats at levels 10, 20, 30 and 40:
| item | Lv. 10 and 30 | Lv. 20 and 40 |
|---|---|---|
| Sword | Hero ATK +250 | Crit Rate +2.5% |
| Gauntlets | Hero ATK +250 | DMG RES +2% |
| Armor | Hero HP +68,000 | Physical DMG RES +10% |
| Boots | Hero DEF +500 | Energy DMG RES +10% |
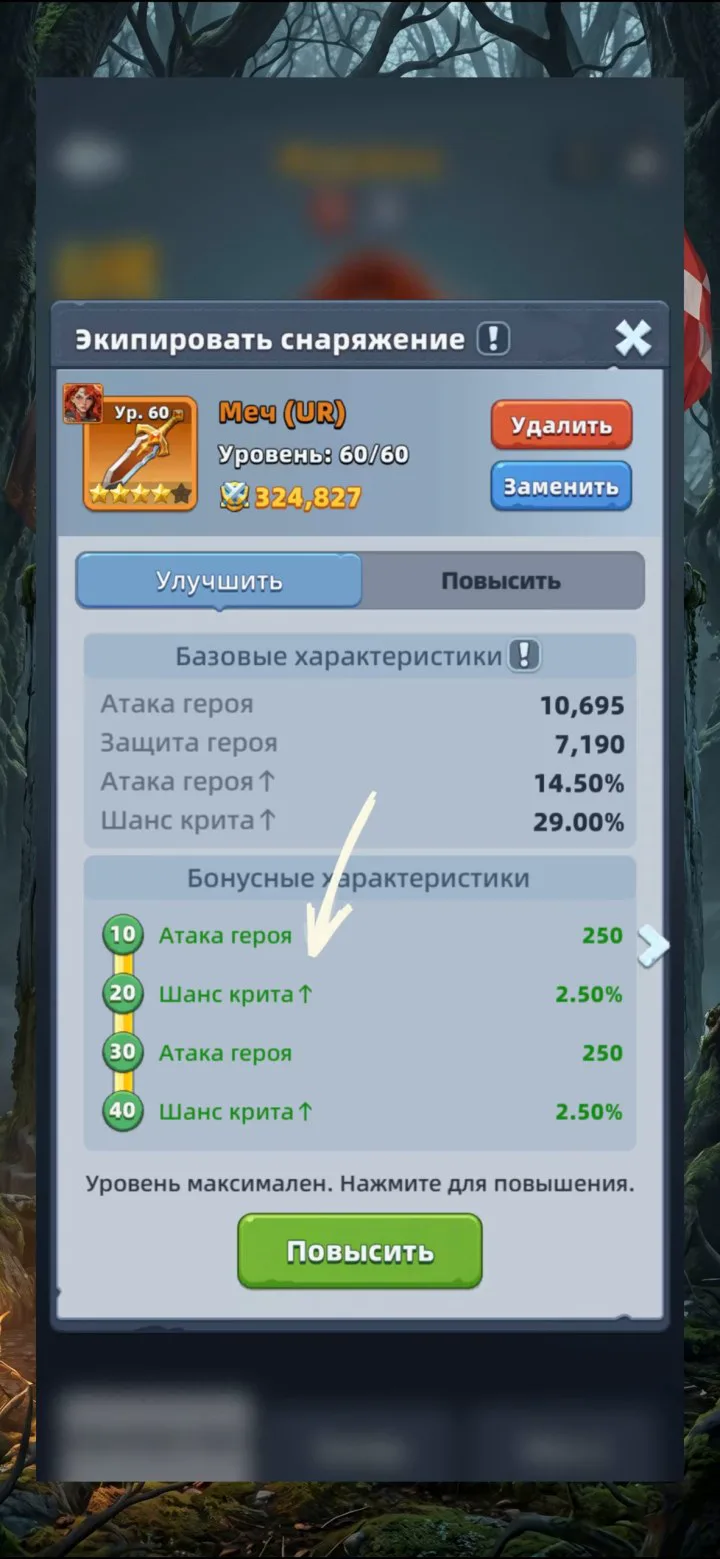
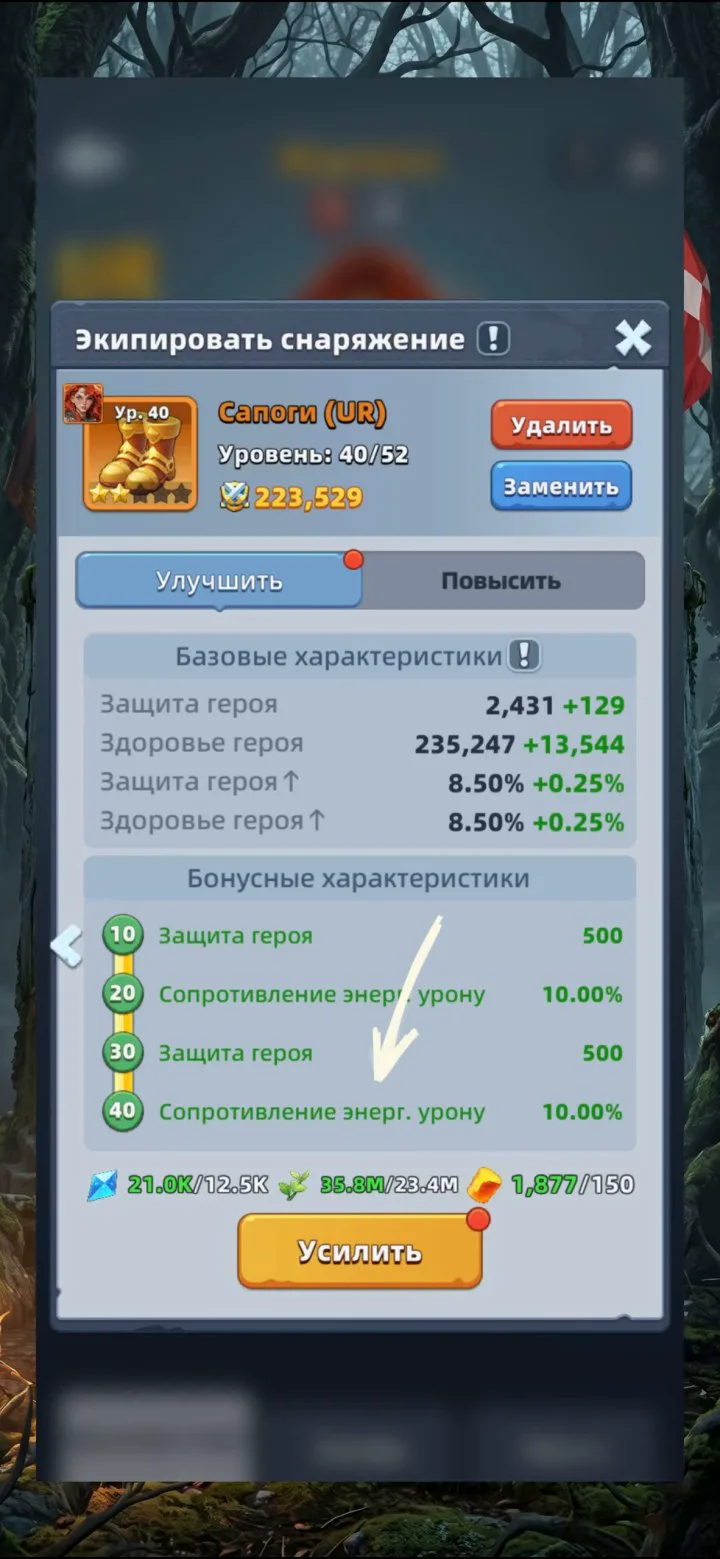
Why tanks get Boots before Armor: almost all strong DPS (except Joker) deal energy damage, and their Ultimate Skills hit in a radius too. In the battle report on damage taken by tanks you can see that they take many times more energy damage than physical.
The order up to level 20:
- Sword for the main DPS (Crit Rate is the main reason for Marlena's huge damage), Gauntlets for him up to 10.
- The same for the second DPS: Sword to 20, Gauntlets to 10.
- Boots to 20: main DPS, second DPS, main tank, second tank.
- Armor to 20 for the tanks (main, second): physical resistance joins the energy resistance.
- Boots for support to 20.
- Gauntlets to 20 for the main and second DPS.
- Armor to 20 for the main and second DPS.
- Gauntlets to 20 for the main and second tank.
- Support: Armor, then Gauntlets to 20.
- The remaining Swords to 20: main tank, second tank, support. Daskal and Louis get the sword first among tanks: their skills heal based on ATK.
Next, once everything is at least at 20:
- The main DPS's Sword up to the limit the stars allow. Without stars the cap is level 44, each star adds 4 levels: 48, 52, 56, and at 4 stars - 60. Hit the cap - level the next item on the list, unlocked a star - return to the sword.
- The second DPS's Sword to the limit as well.
- Gauntlets of the main, then the second DPS to the limit.
- Boots of the whole four to 40 (DPS, DPS, tank, tank): the second energy resistance bonus noticeably raises survivability.
- Armor to 40 for the main and second tank: another +10% to physical resistance.
- Armor to 30 for the main and second DPS (HP).
- Gauntlets to 40 for the tanks, starting with Daskal and Louis if you have them.
- Armor to 40 for the main and second DPS.
- Support: Boots, Armor, Gauntlets to 40.
- Swords to 40: main tank, second tank, support.
Support needs the sword for DEF, and in the late game, when everyone reaches maximum levels, every gain matters.
Max leveling of the remaining items follows the same logic: once the DPS Swords and Gauntlets are done - Boots of the four (DPS, DPS, tank, tank), Armor for tanks, Armor for DPS, Gauntlets for tanks, for support Boots, Armor, Gauntlets, and in the end the remaining Swords (main tank, second tank, support).
Stars: what you need
Stars (the Promote tab) open for UR items from Gear Workshop Lv.20. Besides Gearstone and Tempered Steel, which also go into levels, you need blueprints.
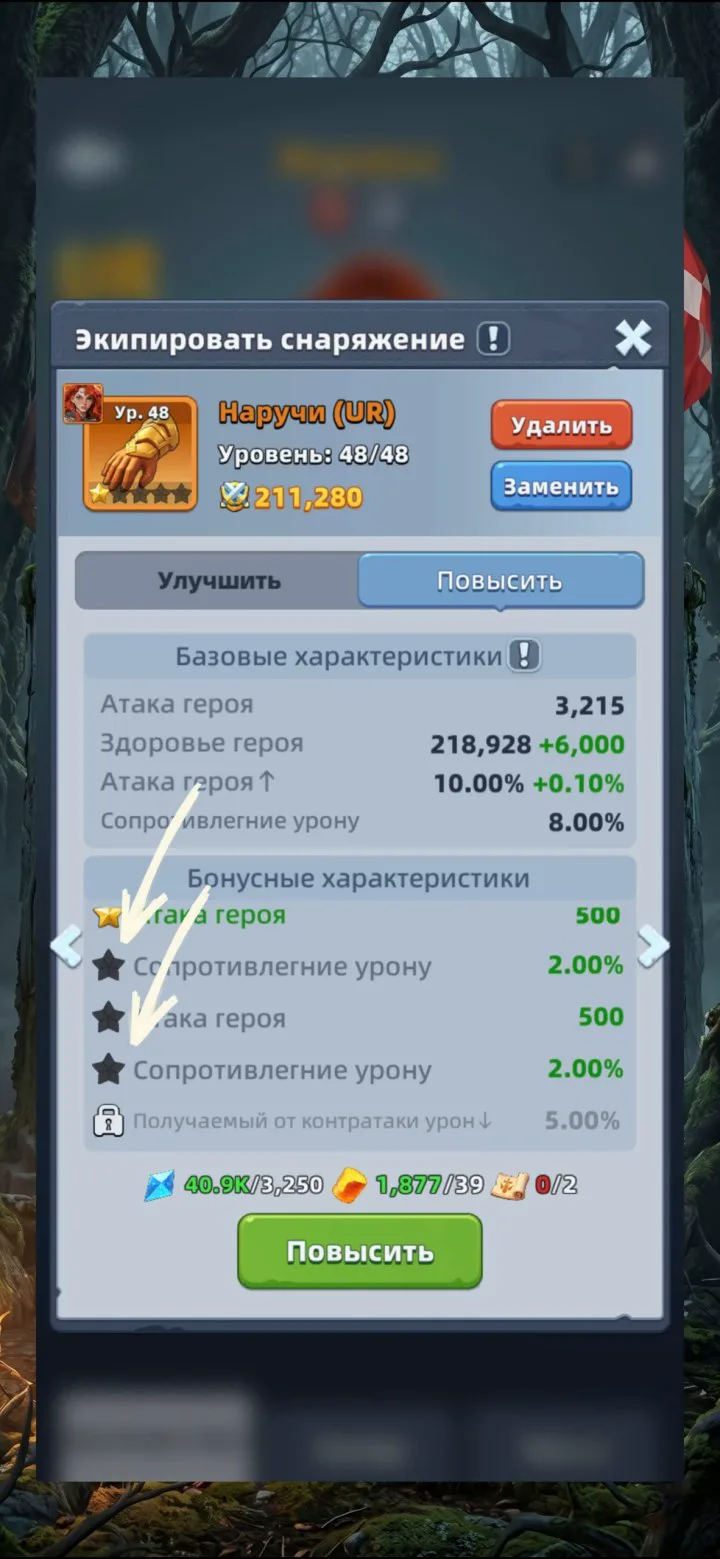
Each star from 1st to 4th is 5 minor upgrades ("petals"):
| star | Gear Blueprint (UR) per step | per star |
|---|---|---|
| 1 | 1 | 5 |
| 2 | 2 | 10 |
| 3 | 3 | 15 |
| 4 | 4 | 20 |
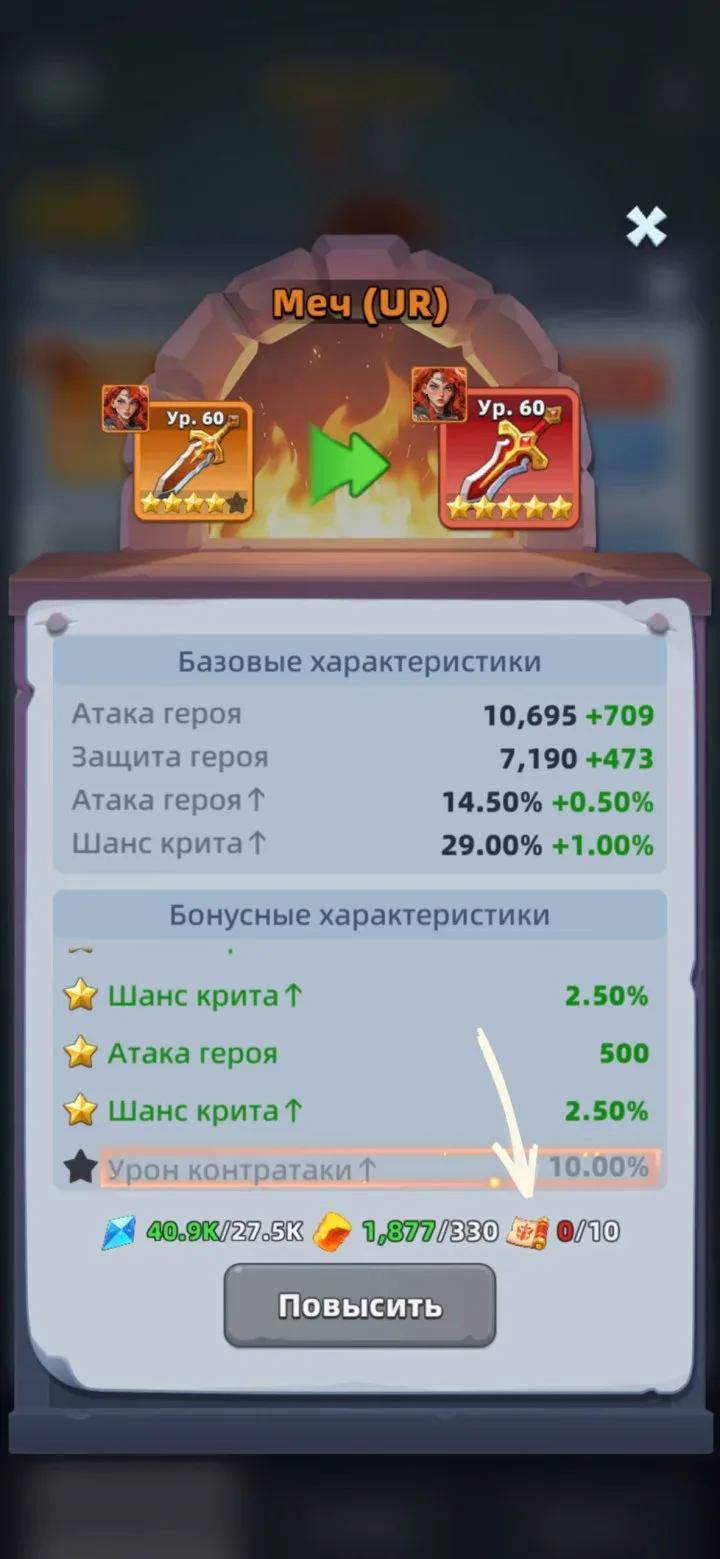
That is 50 UR blueprints per item in total. The 5th star unlocks at once, for 10 Gear Blueprints (MR), and the item becomes MR.
Where to get blueprints:
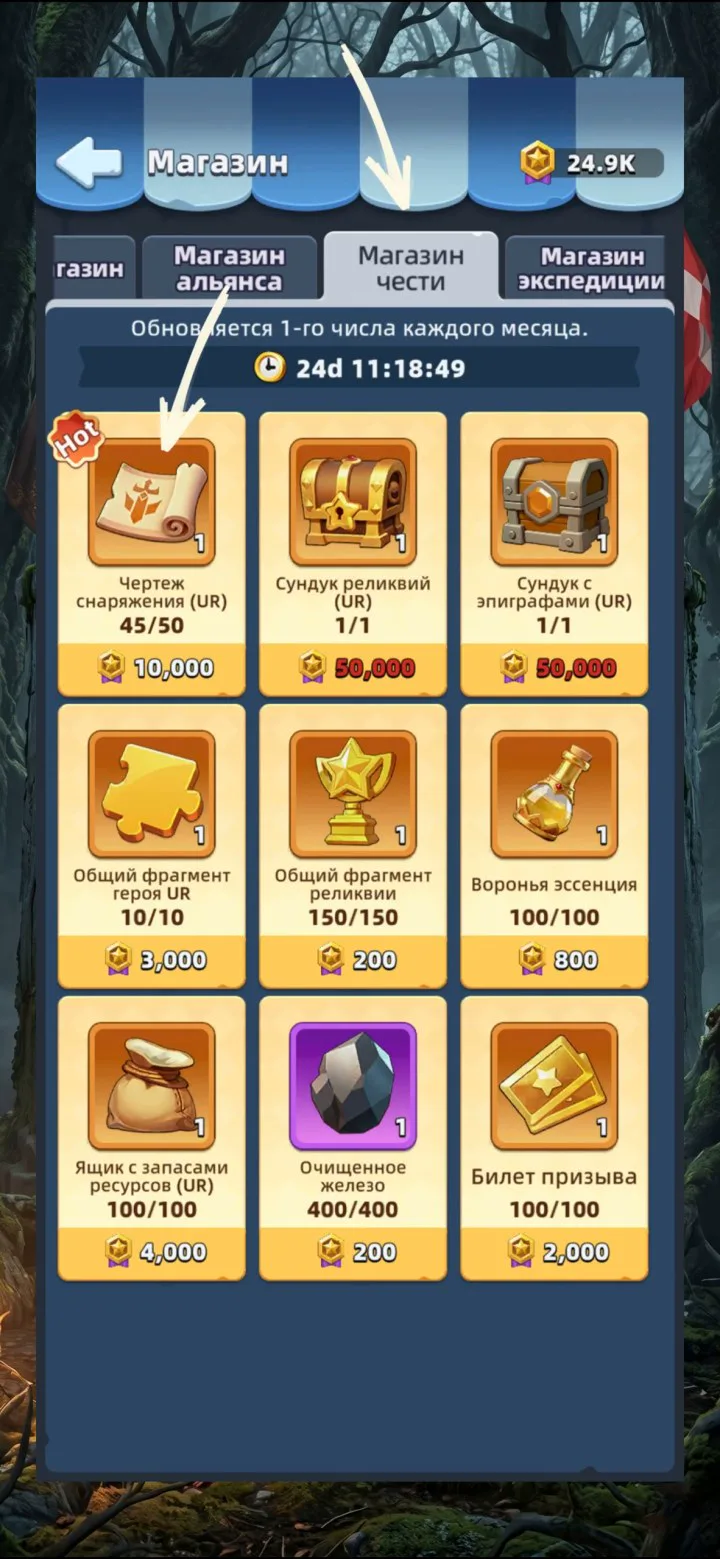
- Gear Blueprint (UR) - the Honor Shop for 10,000 Fame Medals, up to 50 pieces, the shop refreshes on the 1st of every month. Blueprints also show up in the Strange Bazaar event and in bundles.
- Fame Medals come from the versus events: the arena, Elixir Scramble, Kingdom War, Canyon Conquest, Crystal Cluster Valley. Never skip events with Fame Medals in the rewards.
- Gear Blueprint (MR) - for very large damage to Demon King Blight, in the Era Shop, in the Strange Bazaar and in bundles.
Star bonuses:
| item | 1★ and 3★ | 2★ and 4★ | 5★ (MR) |
|---|---|---|---|
| Sword | Hero ATK +500 | Crit Rate +2.5% | DMG Dealt When Countering +10% |
| Gauntlets | Hero ATK +500 | DMG RES +2% | DMG Taken When Countered -5% |
| Armor | Hero HP +140,000 | Physical DMG RES +10% | Crit Rate Taken -15% |
| Boots | Hero DEF +1,000 | Energy DMG RES +10% | Crit DMG Taken -30% |
Star order
The core four:
- Main DPS's Sword to 2★ (damage and Crit Rate), his Gauntlets to 1★.
- The same for the second DPS: Sword 2★, Gauntlets 1★.
- Main DPS's Sword to 4★, to raise it to level 60. Serious spenders - straight to 5★.
- Boots to 2★ (another +10% energy damage resistance): main DPS, second DPS, main tank, second tank.
- Second DPS's Sword to 4★ (or 5★ if your budget allows).
- Gauntlets of the main, then the second DPS to 4★: damage and DMG RES at 2★ and 4★.
- Armor of the main, then the second tank to 2★.
- Boots to 4★ and 5★: DPS, DPS, tank, tank.
- Armor of the main and second DPS to 1★ (HP).
- Gauntlets of the main, then the second tank to 2★.
- Armor to 4★: main tank, second tank, main DPS, second DPS. Those who can afford it make the DPS Armor 5★ before the tanks': reducing Crit Rate Taken matters more to them.
- Gauntlets of the main, then the second tank to 4★.
- Tank Swords: first 2★ each (main, second), then 4★ - at least for the hero's DEF in the base stats.
The remaining 5★: Armor of the main and second tank, Gauntlets of the main and second DPS, Gauntlets of the main and second tank, and in the end Swords of the main and second tank.
Support comes after the whole four is closed at 4★: Boots 2★, Armor 2★, Gauntlets 2★, Boots 4★, Armor 4★, Gauntlets 4★, Sword 4★, then 5★ in the same order: Boots, Armor, Gauntlets, Sword.
One squad to the end
Crafting, levels and stars are done in parallel as soon as the chance appears. The author does not advise spreading the leveling over a second squad too early: in Kingdom War the goal is to break a throne, a turret or a top player's castle, and two half-built squads will break nothing. The same goes for Crystal Cluster Valley, the arena and Elixir Scramble: almost everywhere you need to break through an opponent. So first one squad to the maximum, then the next.